DIY Sandbag Guide: Build Your Own Cheap Training Sandbag
Looking to train hard without spending a fortune? Here’s how to build your own functional training sandbag using military surplus gear and a bit of grit.
Building your own gear says something: you’re here to do the work, not shop for shortcuts. The mental side takes work too. Here’s a free tool I made for it. Get the free Green Supercharger →
The Rogue Fitness links here are affiliate links. I only recommend gear I trust and use myself, and buying through them helps support this work at no extra cost to you. Not that it’ll add up to much on this one. Most of what’s here is used and repurposed gear, plus wood stove pellets, and Big Vic at the Army Surplus store and Rick at Home Depot aren’t cutting me a commission check.
Why DIY?
I love Rogue Fitness gear — and Rogue’s Tactical Sandbags and their 2nd generation are beasts — but outfitting a full gym with them can be pricey, even if it’s your focused AF home gym. I rely on a couple trusted Rogue bags, but during my first commercial gym build, I wanted a dozen sandbags in different weights. That’s when I discovered how effective — and affordable — a DIY option could be.
What You’ll Need
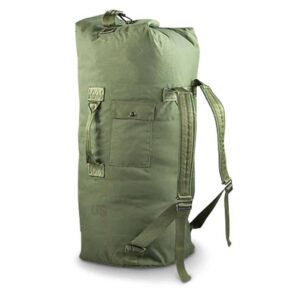
- Military duffel bag (real surplus—skip the cheap knockoffs)
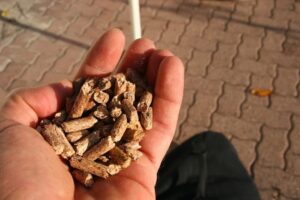
- Wood stove pellets (or recycled rubber crumb)
- Optional: liner bags (construction sacks from hardware store)
- Zip ties
- Optional: old clothes for stuffing
- Fabric marker (for weight labeling)
Step-by-Step Guide
- Get a military duffel bag. Check your local surplus store or online for 22″ x 36″ or larger. These are rugged, water-resistant, and built for abuse.
- Buy wood stove pellets. They hold form well and won’t leak like fine sand. Avoid playground sand—it leaks and shifts too much.
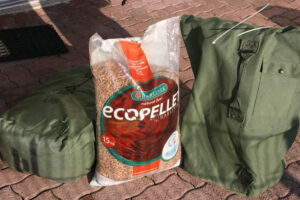
- Use liner bags inside. Makes it easier to clean the duffel and swap out weight. Especially helpful in shared gym environments.
- Fill a liner with pellets and zip-tie it shut. Drop it inside the duffel. Use a second zip tie to seal the outer bag.
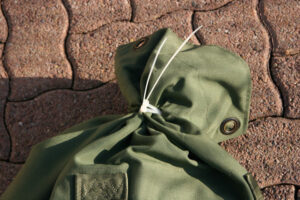
- Cut off any duffel bag straps. Unless you plan to ruck with it, the straps just get in the way.
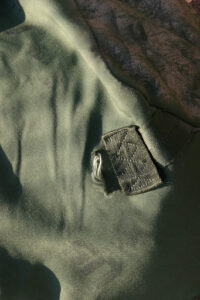
- Label the weight. Use a fabric pen to write the total load in kg or lbs or your own grunt units. I label mine 1 Hilly, 2 Hilly, or 3 Hilly — 3 Hilly means I won’t be able to walk for a week after the session.
Finished Product
What you end up with is a rugged, body-friendly sandbag that’s perfect for:
- Deadlifts and cleans
- Turkish get-ups
- Sandbag carries and stair climbs
- Conditioning circuits
- Weighted box step-ups and walking lunges
- Simulated Log PT
- Hammering away at your frustrations
Other Options
- Convert old gym bags for smaller sandbags (single-arm work, throws)
- Try vintage Swiss or Czech military bags for variety
- Go big with a Rogue Husafell or GORUCK 120lb bag
- If you’re training for SEALFIT Kokoro or a similar crucible with Log PT, check out Rogue’s Log Sandbag. Killer piece of gear right there!
Recommended Weight Range
Start with 20–30kg (45–65lbs). My gear lineup spans 8kg to 45kg. Scale to match your training style.
You just built a serious training tool for almost nothing. Effort over equipment, that’s the whole idea. The mental side works the same way. Green is the one I reach for before a hard session: pure oxygen and energy, a charged-up hit, no gear required. I made a free version. A course video, a coaching audio, a 5-page reference guide, and a guided visualization. Get the free Green Supercharger →
Next Steps
Now that you’ve got a solid DIY sandbag, it’s time to put it to work:
Closing Motivation
Keep it raw. Keep it real. Gear doesn’t make you stronger—effort does. Grab your DIY sandbag and get after it.
Free — The Green Supercharger
Real Coaching, Not a PDF Teaser
A course video, a coaching audio, a guided visualization, and a 5-page reference guide — four formats of the same tool I've coached for twenty years. One color. Everything you need to use it. Free.
GET THE GREEN SUPERCHARGER →